
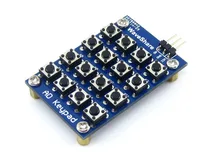
I purchased this module as part of another microcontroller kit, its an interesting little module as it has 16 buttons but with only 1 I/O line is required, an analog input. Usually a keypad needs many I/O pins as you either have to read the individual keys or there is a pin required for the columns and rows
You simply connect this to your Micro:bit and read in the value.
The concept is straightforward you use a resistor network as voltage dividers, and then let each button feed a different voltage to the analog pin. So by detecting the voltage you can tell which button has been pressed. You can only detect one button at a time. This means rather than muliple I/O pins being required you can use 1, it does mean you need to detect the analogue value of the button pressed and act on in your code but this is not that a difficult task
Here is the schematic of the module
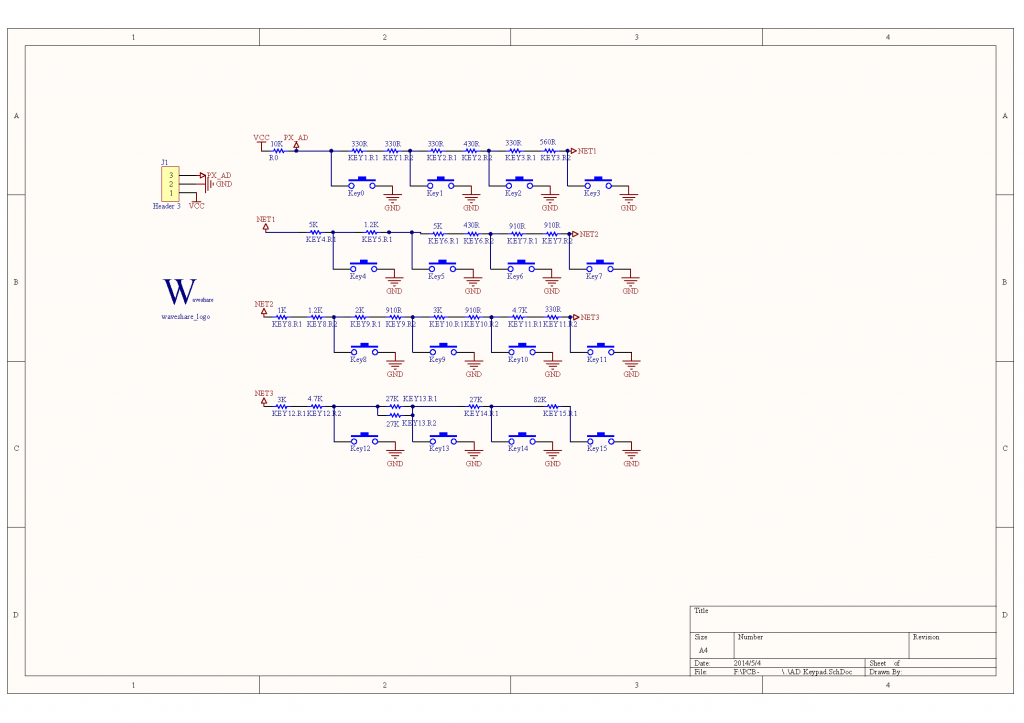
We connect 3v to VCC, Gnd to Gnd and the AD to Pin 0 of the Micro:bit
Parts List
| Name | Link |
| Micro:bit | Micro:bit Development Board |
| AD Keypad | 5pcs/lot AD Keypad 16 4×4 Accessory board matrix buttons controlled ADC AD port keyboard Free Shipping |
| Edge Breakout I/O Expansion | Edge Breakout I/O Expansion Extension Board for BBC micro:bit |
| Connecting cables | Free shipping Dupont line 120pcs 20cm male to male + male to female and female to female jumper wire |
Code
[codesyntax lang=”python”]
from microbit import *

while True:
    reading = pin0.read_analog()
    sleep(100)
    if reading < 990:
        print("Reading: " + str(reading))
        sleep(250)
[/codesyntax]
Testing
Open up the REPL window and press the keys individually, take a note of the values displayed. Here is what I saw
Reading: 2
Reading: 67
Reading: 132
Reading: 198
Reading: 261
Reading: 323
Reading: 387
Reading: 452
Reading: 513
Reading: 577
Reading: 641
Reading: 698
Reading: 759
Reading: 822
Reading: 884
Reading: 945
You can then use these values, if you take a look at them you will see a range. Take key 2 which returned 67, you don’t want to look for exactly 67 but between a range of numbers. The difference between the values returned is around 60 so a good starting point would be 30 lower and 30 higher, so to detect key 2 being pressed you would do the following
if reading > 40 and reading < 94:
Do Something
[codesyntax lang=”python”]
from microbit import *

while True:
    reading = pin0.read_analog()
    sleep(100)
    if reading > 1 and reading < 39:
        num = 1
    elif reading > 40 and reading < 94:
        num = 2
    elif reading > 95 and reading < 164:
        num = 3
    elif reading > 165 and reading < 218:
        num = 4
    elif reading > 219 and reading < 290:
        num = 5
    elif reading > 291 and reading < 354:
        num = 6
    elif reading > 355 and reading < 418:
        num = 7
    elif reading > 419 and reading < 485:
        num = 8
    elif reading > 486 and reading < 544:
        num = 9
    else:
        num = 0
    print("Number: " + str(num))
[/codesyntax]