


In this article I look at another python related board that I purchased. Once again its based around a pyboard
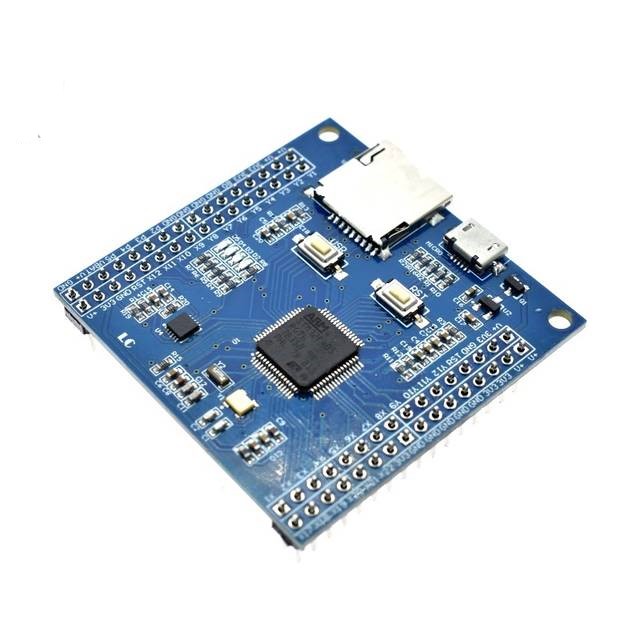
First of all lets look at a picture of the board
Description
This MicroPython development board is based on a STM32F405 microcontroller. The development board has 4 LED lights and an accelerometer.
Features
Onboard STM32F405RG MCU 168 MHz Cortex-M4 CPU with 32-bit hardware floating point
1 MB flash storage, 192 KB RAM
USB port, support serial port, universal storage, HID protocol
SD card slot
MMA7660 3 Axis Accelerometer
4 LEDs
1 reset button and 1 user button
3.3V 0.3A onboard LDO, can be powered from USB port or external battery
Real Time Clock
30 general-purpose IO ports, 28 of these support 5v input and output
2 SPI interfaces, 2 CAN interfaces, 2 I2C interfaces, 5 USART interfaces
14 12-bit ADC pins
2 DAC pins
Usage
You can connect to your board com port using a terminal program like putty to get access to the micropython command line
With your terminal program open you should see a blank screen with a flashing cursor. Press Enter and you should be presented with a MicroPython prompt, i.e. >>>.
To test this you can do the following
>>> print("hello world!")
hello world!
You can also do the following
Once connected to your PC you should see a folder called pybflash, this contains the following files.
-
-
- boot.py – the various configuration options for the pyboard.
- It is executed when the pyboard boots up.
-
- main.py – the Python program to be run.
- It is executed after
boot.py.
-
- README.txt – basic information about getting started with the pyboard.
- This provides pointers for new users and can be safely deleted.
-
- pybcdc.inf – the Windows driver file to configure the serial USB device.
-
You can edit the main.py and run your program from there. Here is an example
Open the main.py file in a text editor. On Windows you can use notepad, or any other editor. With the file open you will see it contains the following text
# main.py -- put your code here!
This line starts with a # character, which means that it is a comment.
Add the following to the file
# main.py -- put your code here!
import pyb
pyb.LED(4).on()
The first line we wrote says that we want to use the pyb module. This module contains all the functions and classes to control the features of the pyboard.
The second line that we wrote turns the blue LED on: it first gets the LED class from the pyb module, creates LED number 4 (the blue LED), and then turns it on.
To run this little script, you need to first save and close the main.py file, and then eject (or unmount) the board USB drive just like a normal USB flash drive.
When the drive is safely ejected/unmounted you can get to the fun part: press the RST switch on the board to reset and run your script.
When you press RST the green LED will flash quickly, and then the blue LED should turn on and stay on.
Links
About $13 for this board
STM32F405 IoT Development Board For PyBoard